Happy hump day! We're in Allentown visiting the inlaws and to celebrate my FIL's birthday. Today has been stellar on many levels: BOTH kiddos napped in the car this morning on our drive {Burke has given up morning naps and most car naps looooong ago}, it's gorgeous outside, Burke and his cousin Jake had some awesome wrestling matches and fun at the park, and both kiddos actually went down for an afternoon nap! {For Burke, this is AH-MAZING because he usually only crashes in foreign beds when he's toast}
In addition to my FIL, I'd like to give another birthday shoutout to my baby sister, Moriah, who turns 20 today. Even though 20 is pretty much a non-year and a 20th birthday is definitely a non-event, I hope she has a wonderful day and even better year! Cheers to next year!
Also, today is my parents' 32nd wedding anniversary! Woot Woot! Happy Anniversary M & D!! {guys--this means that I'm getting OLD!! Eek! They were only married for one year before I was born...} Wishing them many many more happy years and time to enjoy life now that most of their {extra-large} quiver have grown up.
Finally, I'm happy to say that my friend Becky, who blogs over at Mommy In Heels, agreed to be my guinea pig!! Ever since Ken Bruggeman's awesome photography workshop, I've been itching to do some more shooting {of still models and not the spastic hurricanes that are my littles}. So Becky agreed to let me shoot her gorgeous self and I'm thrilled with this fun collaboration. She gets photos for her blog {her hubby is probably breathing a sigh of relief now that he's off the hook--I know mine would!} and I get practice learning my way around my camera and trying to capture the beauty before me. You should definitely hop on over and check out her blog {and my photos!!}.
Happy Wednesday! Have a great day!!

Wednesday, June 12, 2013

Monday, June 10, 2013
Easy No-Sew Burlap Birthday Bunting {Tutorial}

Happy Monday! It's a dreary rainy and perfect day for recuperating from our busy birthday weekend! {It's nap time and the silence is beautiful...I can even hear the dog snoring!} We celebrated Burke's 2nd birthday on Saturday {post coming soon!} and although I was exhausted from planning, cooking and crafting for his big celebration it was such a pleasure to watch him enjoy his day. So while I'm still going through all of the pictures from our weekend and working on a post about his party, I thought I'd share a simple no-sew project you can whip up for your next party.
What you'll need:
>> burlap {a 1/4 yard should be more than sufficient}
>> a piece of paper to use as a pattern {unless you want to freehand your triangles}
>> twine, ribbon, or other material to use to create the bunting
>> fabric paint
>> paint brush
>> pencil, chopstick or other similar item to poke holes in the burlap
>> stencils {optional}
What you'll do:
>> Draw a triangle on a piece of paper and cut it out. This will be your pattern. {Make sure the triangle is long and wide enough to accommodate a letter plus two holes along the top--mine were about 4 in. at the widest part by 8 in. long}
>> Using your paper pattern, cut out enough triangles from the burlap to spell whatever sentiment you wish. I needed 13 triangles for my "happy birthday" bunting.
>> If you want to use stencils to get nice uniform lettering, this is the time to break them out. I opted to freehand my letters and I think they turned out pretty good. Make sure to lay down newspaper so that your paint doesn't ruin your work surface. I simply eyeballed the center of my burlap triangle and painted each letter in that spot. In order to keep my letters about the same size, I placed the triangle I was about to paint on top of one that had already been painted and outlined the shape of the letter using the bottom letter as a guide for height and width.
>> Once your letters have dried, take a pencil, chopstick or anything else that might be similar and poke two holes in the top of each triangle, about an inch down from the top. I tried to center my holes about 1 inch down and 1 inch in on each side. I used my first triangle as a guide for the rest.

>> Lastly, cut a piece of twine, ribbon or whatever you're using here as long as you need your bunting to be. I cut my twine about 6 feet long and had plenty on each end to help attach it to the table it decorated. Starting with your first letter, insert your twine up through the back of the first hole and across the front of the triangle back down through the second hole. Repeat this process until all of your letters have been strung.

Hang and enjoy! {PS--I snapped this photo quickly before any of the food hit the table so pardon the empty table}
What are some of the easy diy projects you have done for parties and celebrations?
Monday, June 3, 2013
Dear Burke {a letter on your 2nd birthday}
dear sweet boy,


i love you. more than anything. more than a sunny day, sushi, and a good book. seriously, you make my world go 'round. watching you learn, grow and experiment with each one of your five wonderful senses has given me such pleasure these past two years. {has it really been two years?? my goodness} i couldn't have imagined this life just two years and one day ago. i couldn't have imagined how happy i would be. how much i would learn to love. how far i'd be challenged. and how deeply my life would be enriched. but just like that my world turned upside down and i am so deeply in love with my job as your mama. i wouldn't want it any other way. so on your second birthday, i just want to say a few things. pray a few prayers.

i pray that you'll never lose your contagious smile and soft warm eyes. you have a way about bringing out the best in people, from those you know to strangers on the street. when you're around the world is all right. your smile penetrates any barriers and your eyes let them know it's okay.

i pray that you'll always possess a passion for life the way you do now. you take life by the horns, excitedly navigating your way through each moment of each day. no obstacle is too big for you. you're a problem solver and a daredevil. you eye up an obstacle, run a few quick calculations in your little head and then dive in full force, smiling all the while. and even when you stumble or fall, you bounce back up and try again. nothing keeps you down and i love that about you.

i pray that you'll always have a generous and empathetic heart. you may be a tough kid when it comes to bumps and bruises, but you have the most pure and authentic heart. you've cried when others have cried...empathizing with them. you share your food and toys even when unprovoked. when your sissy cries, your first instinct is to pray for her because you think she might be hurt or upset. when you notice someone with a boo boo, you kiss it. and then you pray for healing. you adore your sister and she adores you. even at your young ages, my eyes tear up with the adoration you share with each other. it is really so precious. the thing i love most about you is that you love everyone without inhibition. you don't see size, color, or disability. it's like you see straight into a person's heart and you just love them. i want to be more like you, Burke. i want to love like you do.

happy 2nd birthday, sweetheart. i love you.
xoxo,
mama
Friday, May 24, 2013
Violet Laine: 5 Month Snapshot
Can't believe she's five. months. old!!!! She's getting so big so fast! Here's what she's been up to:

Have a great Memorial Day weekend! Thanks to all who serve our country!

Have a great Memorial Day weekend! Thanks to all who serve our country!
Tuesday, May 14, 2013
There's Only One Problem...
I don't have enough time in this life to learn and do and travel. If money grew on trees and college was free, I'd be a lifelong undergraduate student who traveled the world on my breaks. Seriously. Every two years or so, I'd be able to switch to a new major. Learn a new trade. Read new books. Practice. And explore.





Sadly, I have come to learn that college is not free {hello six-figure school loan debt that my kids will be lucky not to inherit} and I've resigned myself to the fact that the money tree is as real as the fountain of youth. And time is ever elusive, which is why every moment really does count. So this past weekend, my hubby gave me a wonderful Mother's Day gift--a spot in Ken Bruggeman's photography workshop. Because I don't have time to learn Photoshop. I don't have time to become a pro. Even if I knew my way around Photoshop, I don't have time to edit. I'm a crazy busy mama who has way too many kettles cooking! So if I'm going to take a picture, it better be good. And Ken's workshop was created for exactly that purpose.

His workshop is for people like me. People who would like to learn how to use their fancy cameras but don't have time to read a manual. People who want to capture the important moments in their lives without harsh shadows and deer-in-the-headlight eyeballs. And it was so worth it! It was timed perfectly over naptime {probably the only reason my hubs gave me the green light!!} and we spent the first two hours in Ken's studio going over the technical stuff. Ken is an amazing photographer, and he's also an amazing teacher. He's not at all like my high school chemistry teacher who was sooo super smart but couldn't explain even the simplest of concepts. Ken broke it down and put it all together in a way that I understood. And that I'm not going to forget!! Bingo!

After our lesson, we went to an amazing location and had the opportunity to shoot a ridiculously beautiful young-in-love couple. I mean, seriously gorgeous! We just so happened to catch the two most beautiful hours of the day too. You'd never know it had been raining all day.

Before Ken's workshop, I had been practicing using the manual mode on my camera. But I really didn't really know the technical aspects so I would just randomly change the settings until I got something resembling a good picture. I had, however, never experimented with manual focusing and always just let my camera do the job. Ken encouraged us to use manual focus, which I did. However, I sometimes forgot that the camera wasn't going to focus for me and ended up with some blurry shots. Like this one, which is one of my favorites even though it is a bit blurry:

Because I had a hard time picking my favorites, here are a few bunch more from the shoot:


{And a few of Ken who was a stand-in model for a bit...}



I wish my backgrounds were a bit more blurred, but until I get a different lens, I'll be working with the limitations of my camera/lens kit. If you have any interest whatsoever in learning to take better photos of your kids, dogs, nature, whatever, I would highly recommend Ken's workshop! He usually offers one per month and keeps the class size small and intimate. It's an amazing learning experience and a time to make new friends. And ending the class at a local bar chatting about our experiences over a local brew was just the icing on the cake for me.
{Disclaimer: I was not paid for my opinions. All opinions are my own. Over the years and through the shoots, we have come to be good friends with Ken and I just love the way he tells stories through his photos. To see more of Ken's amazing work, check out Violet's Birth Story, Burke's Birth Story, Burke's newborn photo shoot, Violet's newborn photo shoot, our family photos, and our maternity photos which were taken right before Burke was born.}
Friday, May 10, 2013
The {Very Factual, Historical, Proven} Story of Mother's Day
Once upon a time, there was a conniving, clearly unwed holiday inventor who decided to wreak havoc on nice little families. And so he {or she} invented a new holiday called Mother's Day. And he {or she} made up the rules and said that sons and daughter were supposed to honor their mothers on this day by buying them nice presents, taking them to fancy restaurants, giving them lovely bouquets of expensive flowers. And on top of that, sons and daughters were to make sure to visit their mothers on this very special and important day, because then they would know that they were really loved. And so, this conniving, clearly unwed holiday inventor sat back and enjoyed the fruit of his {or her} labor. He {or she} watched as sons got chewed out by their mothers for going to their mother-in-law's that day. Daughters were given the silent treatment and guilted to death for being "fair" to their mother-in-law who had made it clear where her son {the daughter's husband} should be spending his Mother's Day. And the more it spiraled out of control, the more this conniving, clearly unwed holiday inventor laughed and cackled and danced with pleasure.
But then there came a day when this one mother--a new mother {and a daughter in the rat race described above}--said ENOUGH!!! I CHOSE TO BE A MOTHER. My child didn't choose me. It was my destiny. My desire. To love and to hold. To protect and to nurture. To teach and to learn. To have and to give. To cuddle and cry. To cheer and to pray. To steward and treasure. And each day that I do this is mother's day to me. With each wound that I kiss and each tear that I wipe, I know that I am Mama and Mama makes it right. With soft soothing lullabies and a warm embrace, I know that I am Mama and Mama does the best goodnight. With every story I read and meal that I make, I know that I am Mama and Mama does it just right. And those soft sweet hands that reach out to me are all that I need to feel complete. I don't need presents or flowers or even your time. My heart never empties of love for you and I want you to know that I am fine. Whatever you do, wherever you go... Have fun. Be you. I love you so.
The conniving, clearly unwed holiday inventor was stymied at last. If more mothers were like this one then havoc would cease. What would he {or she} do in a world filled with peace? Create Father's Day, of course!
Wishing all of you mamas a wonderful, extra special Mother's Day!
{p.s. I love my mother and mother-in-law dearly and they should not take offense at this silly story. I blame the conniving, clearly unwed holiday inventor for any sore feelings!}
But then there came a day when this one mother--a new mother {and a daughter in the rat race described above}--said ENOUGH!!! I CHOSE TO BE A MOTHER. My child didn't choose me. It was my destiny. My desire. To love and to hold. To protect and to nurture. To teach and to learn. To have and to give. To cuddle and cry. To cheer and to pray. To steward and treasure. And each day that I do this is mother's day to me. With each wound that I kiss and each tear that I wipe, I know that I am Mama and Mama makes it right. With soft soothing lullabies and a warm embrace, I know that I am Mama and Mama does the best goodnight. With every story I read and meal that I make, I know that I am Mama and Mama does it just right. And those soft sweet hands that reach out to me are all that I need to feel complete. I don't need presents or flowers or even your time. My heart never empties of love for you and I want you to know that I am fine. Whatever you do, wherever you go... Have fun. Be you. I love you so.
The conniving, clearly unwed holiday inventor was stymied at last. If more mothers were like this one then havoc would cease. What would he {or she} do in a world filled with peace? Create Father's Day, of course!
Wishing all of you mamas a wonderful, extra special Mother's Day!
{p.s. I love my mother and mother-in-law dearly and they should not take offense at this silly story. I blame the conniving, clearly unwed holiday inventor for any sore feelings!}
Monday, May 6, 2013
Steps Toward Sustainability: Reusable Cotton Pads {Tutorial}

Ever since I came across the idea of reusable cotton pads, I've wanted to make some of my own. Like I said before, the only makeup I wear {if any} is mascara, so I usually use two cotton pads in my evening makeup removal routine--one for each eye. Sure, it's only two a day and when you buy the bulk pack from BJ's, it takes quite a while to move that many cotton pads. But knowing there was a cheaper, more sustainable option available, I decided that when I ran out of my last pack of cotton pads, I wouldn't buy them any more. So now, I use these reusable cotton pads and because they're a little bigger and a little thicker, I can use one pad for both eyes! {fist pump!} Plus, I feel better about knowing that I'm working toward a more sustainable lifestyle, which is something very important to me. {You can read about cloth diapering here or click here for a tutorial on reusable paper towels}
So, here's what you'll need to make yourself some reusable cotton pads:
~ some soft flannel {anything will do from new flannel by the yard to an old sheet or pillowcase}
~ scissors or rotary cutter/mat
~ sewing machine and matching thread
First, cut out 3-in. squares from your flannel. You'll need three squares for one cotton pad. I made 25 cotton pads so I cut out 25 squares from the patterned flannel and 50 squares from the plain flannel.

Then, pin three pieces of flannel together as shown below. If you're using a patterned piece and some coordinating plain fabric like I did, then be sure to pin the right sides together. You'll want to leave a small space {about one-and-a-half inches} for turning your pads right side out, which is why I put two pins on the one side. {I sometimes forget to leave my space until the end and it's easier to close up your space when it's in the middle of your fabric rather than at an end.}

Stitch around each pad with about 1/4" seam allowance. I usually just line it up with the edge of my foot and zip around. Again, be sure to leave about a one-and-a-half-inch space along one side so that you can turn it. Don't forget to backstitch on both sides of the open space, otherwise your threads will unravel when you go to turn it right side out.

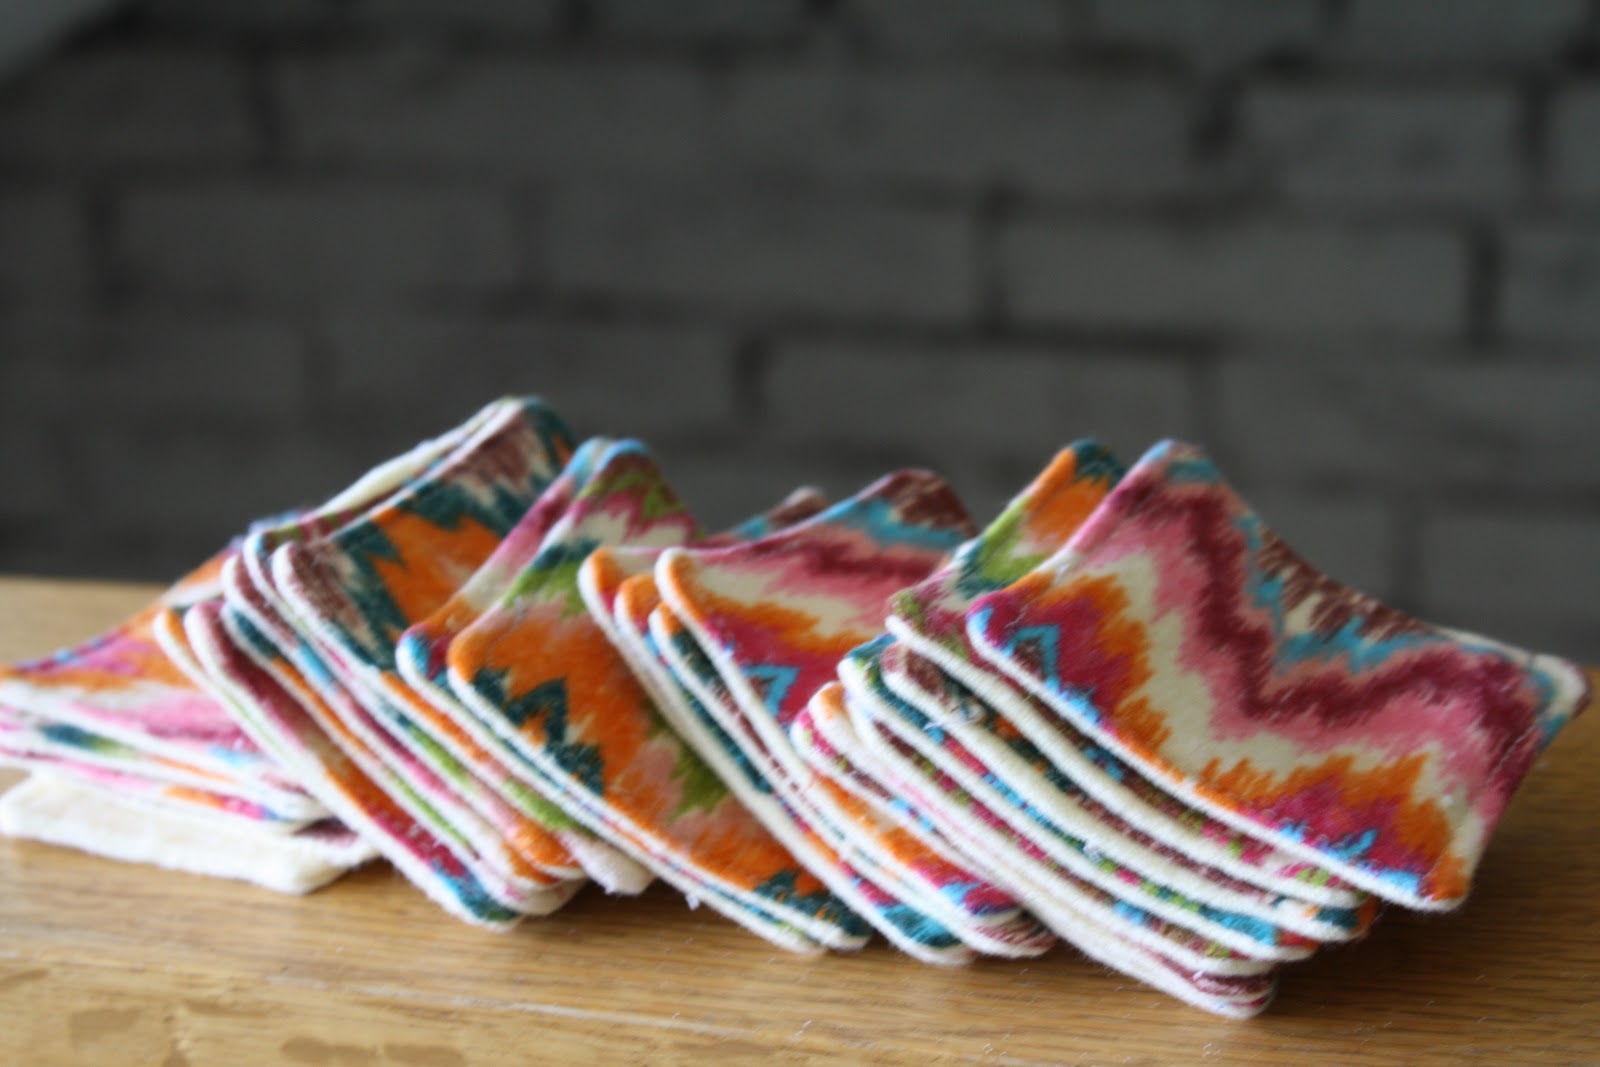
Clip all four corners of your pad and trim off the excess material {not necessary, but it'll make top stitching easier if there's less bulk}. Go ahead and turn your pads right side out, poking out all four corners with a chopstick {or whatever tool you prefer}. Fold the open seam under about 1/4 inch and press with a hot iron to hold it in place. Top stitch around each pad, sewing the opening closed. I sew as close to the edge as possible--about 1/8". You'll probably have to hand crank your corners as it gets a bit bulky and hard to feed through the machine. But once you finish, you'll end up with a pretty little reusable cotton pad like this:

Nice and thick and soft!

I will warn you that this project can be a little time consuming, since you're working with small pieces. But it's totally worth the effort! And if you're going to make a few, why not make a few more so that you'll have enough to last you for a while.

If you need some eye makeup remover to go along with these reusable cotton pads, check out my tutorial for avocado eye makeup remover. It's ah-mazing!

Not up for the project? Want some of your own or for a gift? Email me at lifesongmama@gmail.com for more information about placing your custom order.
Subscribe to:
Posts (Atom)