Showing posts with label Natural. Show all posts

Monday, October 28, 2013

Homemade Elderberry Syrup


Fall brings a lot of wonderful things, but it also brings on cold season. Last night was a reminder for us, as my husband and I took turns rocking our coughing little boy. Nothing breaks my heart more than his sweet little face twisted in discomfort and sorrow. So, today, I made elderberry syrup. It's been on my to-do list for a while now, and thankfully, I had just purchased some elderberries at Kramer's Spice Market at Central Market.

So before I share the recipe, I want to share the healing properties of each ingredient in this amazing syrup:
~ Elderberries are often used for their wonderful antioxidant properties that help boost the immune system in order to fight coughs, the flu as well as bacterial and viral infections.
~ The healing properties of raw honey are too numerous to list. Simply put, honey is considered a cure-all remedy for nearly everything. From burns to bones to immune systems, it works magic all around. For this recipe, however, raw honey boosts the antioxidant properties of the syrup and it helps stimulate the immune system to fight infections such as colds and other bacterial or viral infections.{NOTE: local raw honey is the best and can be found at your local farmers' market or health food store. If you cannot get local raw honey, make sure you purchase raw honey, as the integrity of the product has not been refined, removing all of the good healing properties.}
~ Cinnamon contains antibacterial and anti-inflammatory properties which help aid digestion as well as help raise the body temperature which combats breathing problems. As a result, it is an excellent addition to this syrup, as it helps fight coughs and colds.
~ Cloves contain both antioxidant and anti-inflammatory healing properties {among many others} that aid the effectiveness of this syrup.

Homemade Elderberry Syrup
~ 2 oz. dried elderberries {or 4 oz. fresh}
~ 4 cups water
~ 3/4 cup raw honey
~ 1 cinnamon stick
~ 1/2 Tbsp. ground cloves

Combine water and elderberries in a saucepan and bring to a boil {uncovered}. Reduce heat and simmer about 30 minutes. Add cinnamon stick and cloves and stir to combine. Continue simmering, uncovered, for an additional 30 minutes, or until reduced by about a third to half. Remove from heat and strain liquid into a bowl {I used cheesecloth}. Allow liquid to cool to about room temperature. Add honey and whisk to combine. Pour syrup into an airtight glass container and store in the fridge. It will keep for a few months in the refridgerator. Recommended dosage: 1/2-1 tsp every 2-3 hours for small children/toddlers at the onset of illness, continuing only for a few days {not more than 5}. For bigger children and adults, increase the dosage to 1/2-1 TBSP every 2-3 hours.

** Never give to infants under 1 year since it contains raw honey. And, as with anything, I encourage you to do your own research! This is an excellent source on the topic.

Tuesday, September 24, 2013

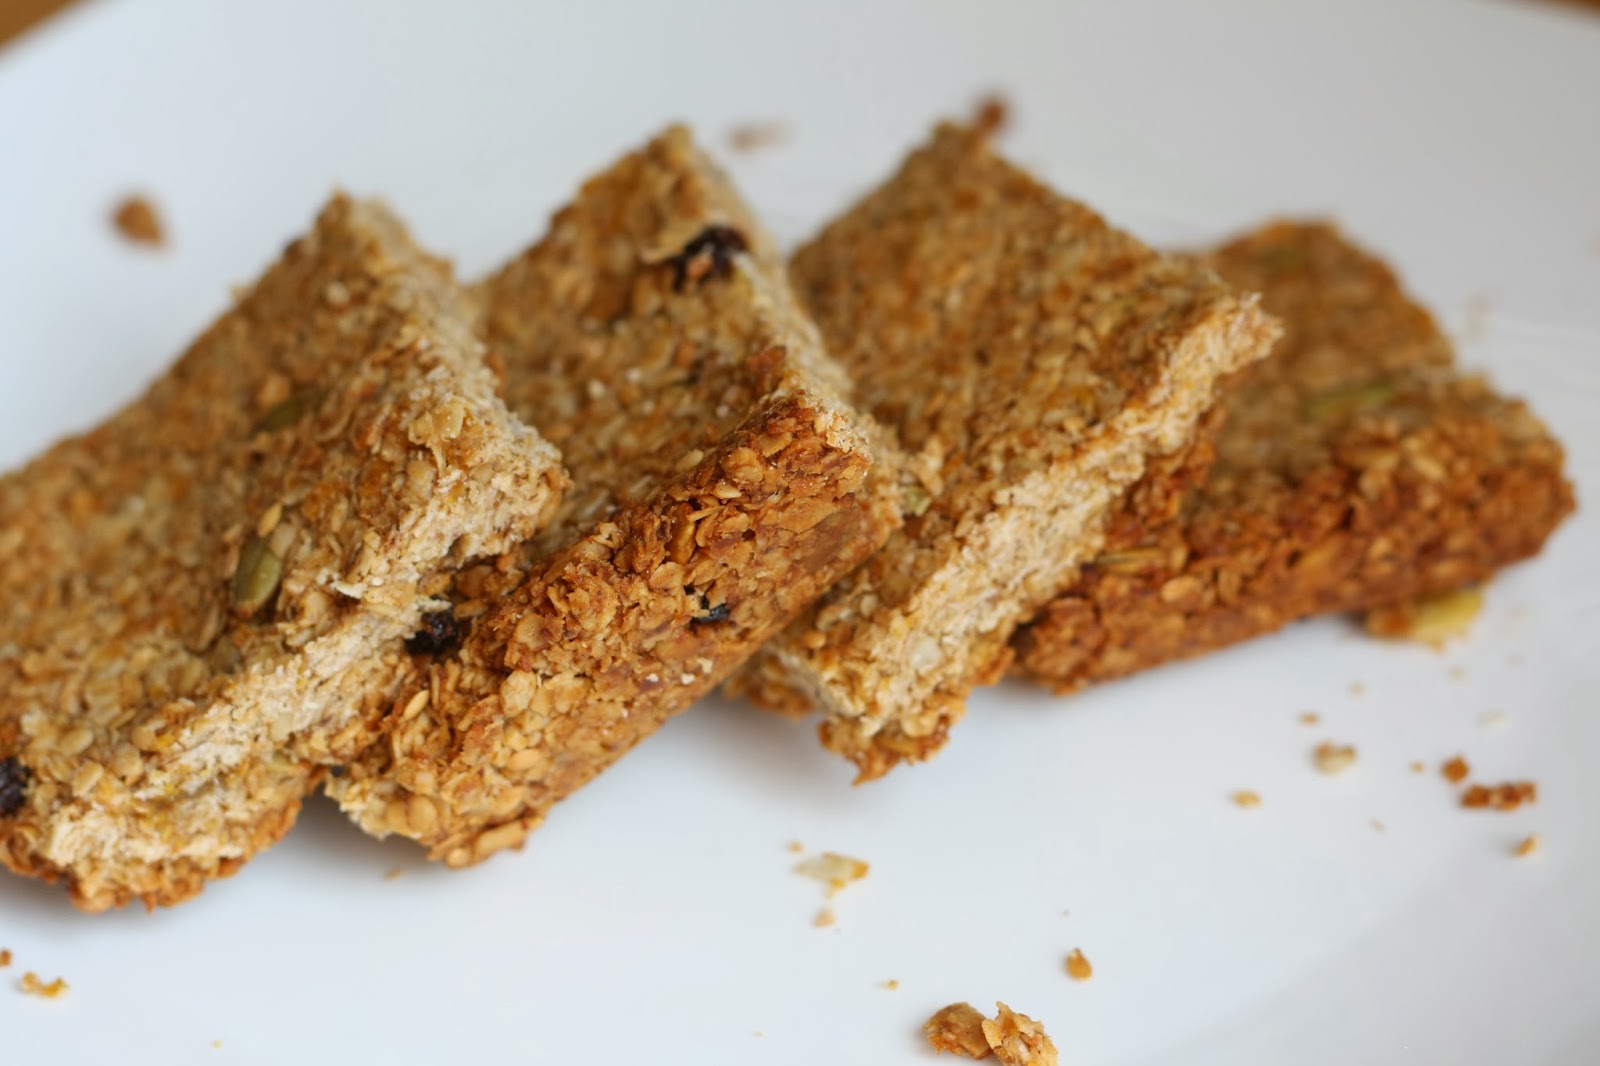
Pumpkin Granola Bars


It's back and it's everywhere. Pinterest. Starbucks. From candles to bread to drinks to the pumpkin patch. Is it just me or is pumpkin super popular these days? Like pop culture popular. I feel like pumpkin has it's own style, and it's definitely a household name. For me, it's delicious and fragrant and taking up space in my freezer!!! So, in an effort to use up last year's stock and make room for some new stuff {my parent's pumpkins are always prolific so we end up freezing a TON!} I've been putting pumpkin in everything.


When I first made these pumpkin granola bars, I wasn't sure whether my hubby would be on board or not. He likes pumpkin but not pumpkin pie or pumpkin spice lattes or any of the other pumpkin goodness that I love. But I made them with him in mind, since now he's back at school and needing snacks to get him through the day. I also made them with Burke in mind, since he's at the age where he eats like a grazer. All day long. Little bits at a time. So I like to keep healthy snacks on hand for him as well.


Needless to say, these were a hit with everyone! They had a nice granola bar texture--soft and chewy, but not sticky or messy--and they were easy to eat on the run.


Healthy Pumpkin Granola Bars 
adapted from Oh Sweet Basil Pumpkin Spice Granola Bars 
Ingredients:

4 cups quick oats
      1/2 cup coconut oil
     1/4 cup organic cane sugar or sucanat
     1/2 cup pumpkin puree
     1/2 cup honey
     1 1/2 teaspoons pumpkin pie spice*
     1/2 teaspoon sea salt
     1/2 cup pepitas {pumpkin seeds}
     1/4 cup sunflower seeds
      1/4 cup flax seeds
        1/4 cup unsweetened shredded coconut
      1 Tablespoon wheat germ 
      1 – 1 1/2 cups raisins
  
Directions:

Heat the oven to 325 degrees and place parchment paper in a 9x13” baking dish
 
     In a large bowl, mix together the oats and coconut oil. Add the pumpkin, honey and sugar and mix thoroughly. Add in the remaining ingredients and stir to combine.
  
      Press the mixture into the parchment-lined baking dish and bake for 30 minutes. Remove from the oven  and press down on the granola bars using a spatula or large spoon. Bake for an additional 20 minutes. Remove from the oven and allow them to cool completely before cutting.

* Don’t have pumpkin pie spice? Make your own! Simply combine 4 Tablespoons of ground cinnamon, 4 teaspoons of each ground nutmeg and ground ginger and 3 teaspoons of ground allspice. {This will give you plenty of pumpkin pie spice for all of your Fall recipes!}


Hope you enjoy these as much as we did!!

What are some of your favorite Fall foods, flavors and/or fragrances?

Tuesday, September 3, 2013

There's Something I Have To Tell You

And no, I'm not pregnant. Promise! {In my family, that's usually the first guess when someone of childbearing age/station begins a sentence that way}

photo credit Ken Bruggeman
Seriously, though, I've been holding out on you. I haven't yet told you the whole story. Fear held me back. But now, fear has to go. And faith must endure.

Over three years ago, God started speaking to Ben's heart and my heart separately. But He was telling us both the same things. Things about our destiny and our future. And then we'd be talking about the things on our hearts, sharing our dreams and desires, and we'd realize that suddenly we were both desiring the same things, dreaming about the same destiny--our futures looked identical--and all of it was new. None of it was familiar. We had been married over a year at that point and none of this had ever come up in conversation.

photo via
Except that I can remember {periodically throughout my life} emphatically declaring: I will NEVER live on a farm. I will NEVER be a farmer's wife.

photo via
But suddenly, my heart yearned for nothing else. Suddenly, the only future I could see involved my family living, working, loving and worshipping in fields and meadows. I could only see a way of life that involved raising animals for meat, dairy, and eggs the way they were intended to be raised--sustainably, on grass. Cows. Pigs. Chickens. And this was all that my husband could see as well. {My husband, who once turned his nose up at the thought of attending an agricultural college because "it stinks!"}

photo via
You see, God laid this destiny on our hearts and from it grew up the desires of our hearts. Three years later, we are at the point where we can no longer decipher between destiny and desire, because they're the same. And it's wonderful.

photo via
There's only one problem. We don't own a farm. We don't have family that owns a farm. And we don't have the finances to afford a farm. Not even a small farmette. Nope. Nothing. But here's the thing--the thing I've been keeping from you--we don't see that as a problem. Because God has promised to provide us with a farm. Three years ago, when He started working on our hearts, He told us that He's prepared a place for us. And He would provide us with a farm.

Now, even with a promise like that, it's hard to imagine it really happening. Circumstances say it won't happen. Natural realities say that it won't happen. And I'm not here preaching some prosperity gospel, but guys--it's going to happen! I've been afraid to tell you this because what if it doesn't happen. But that silly fear is not from my God and lately I've been so burdened by the need to share my story even before it's complete.

photo via
So here it is. We believe that God is going to give us a farm. It's okay to be skeptical and doubtful. Most of the people we've told this to react that way. And we understand. It doesn't make sense. No one has ever seen something like this happen. And you haven't received my promise because it's mine. But we're standing in faith, believing that soon we will be living on a farm, restoring the land and really beginning our journey toward living life as it was intended. Because either God is God or He's not. And we've come to know Him too well {or else we're just too stubborn to admit otherwise} to believe that He doesn't exist and that the things He says are not true.

I know this post is long, but I'd like to share our friends' story. It's a story I was expectantly waiting to hear. And I think you'll be amazed too!

{copied from his Facebook page}:

I've been waiting to release this testimony, but now is the time. As most of you know, my wife and I had been trusting God to provide a minivan for our family the moment we realized our family was growing from 4 to 6. We became a one vehicle family in November 2012 and have watched God provide for our needs through people literally giving us full use of their cars for 3 months at a time. When the twins were born on August 10th, I was caught off guard. The van had not come yet. It certainly wasn't how I planned for it to go down. I thought for sure that the van would precede the twins birth. Three days after the twins were born, I received an email from a woman who had heard me preach a few weeks ago. During the sermon, God put it on her heart that she and her husband were to buy us a minivan. The picture you see is that van. Last Wednesday, the very next day after her email, this couple took me to Performance Toyota in Sinking Spring and wrote a check for $27,500 for a 2012 Toyota Sienna LE with only 10,000 miles on it.
It has always been my desire to see the fruit of what I claim I believe and for everyone who knows me to see the salvation of God in my life. During this whole time, one verse rang out in my heart: "He knows what I need before I ask." And He knew I needed a van. God is good. God is faithful.


Photo: I've been waiting to release this testimony, but now is the time. As most of you know, my wife and I had been trusting God to provide a minivan for our family the moment we realized our family was growing from 4 to 6. We became a one vehicle family in November 2012 and have watched God provide for our needs through people literally giving us full use of their cars for 3 months at a time. When the twins were born on August 10th, I was caught off guard. The van had not come yet. It certainly wasn't how I planned for it to go down. I thought for sure that the van would precede the twins birth. Three days after the twins were born, I received an email from a woman who had heard me preach a few weeks ago. During the sermon, God put it on her heart that she and her husband were to buy us a minivan. The picture you see is that van. Last Wednesday, the very next day after her email, this couple took me to Performance Toyota in Sinking Spring and wrote a check for $27,500 for a 2012 Toyota Sienna LE with only 10,000 miles on it.
It has always been my desire to see the fruit of what I claim I believe and for everyone who knows me to see the salvation of God in my life. During this whole time, one verse rang out in my heart: "He knows what I need before I ask." And He knew I needed a van. God is good. God is faithful.


Thanks for your prayers!

xoxo,
Tabitha

Monday, May 6, 2013

Steps Toward Sustainability: Reusable Cotton Pads {Tutorial}


Ever since I came across the idea of reusable cotton pads, I've wanted to make some of my own. Like I said before, the only makeup I wear {if any} is mascara, so I usually use two cotton pads in my evening makeup removal routine--one for each eye. Sure, it's only two a day and when you buy the bulk pack from BJ's, it takes quite a while to move that many cotton pads. But knowing there was a cheaper, more sustainable option available, I decided that when I ran out of my last pack of cotton pads, I wouldn't buy them any more. So now, I use these reusable cotton pads and because they're a little bigger and a little thicker, I can use one pad for both eyes! {fist pump!} Plus, I feel better about knowing that I'm working toward a more sustainable lifestyle, which is something very important to me. {You can read about cloth diapering here or click here for a tutorial on reusable paper towels}

So, here's what you'll need to make yourself some reusable cotton pads:
~ some soft flannel {anything will do from new flannel by the yard to an old sheet or pillowcase}
~ scissors or rotary cutter/mat
~ sewing machine and matching thread

First, cut out 3-in. squares from your flannel. You'll need three squares for one cotton pad. I made 25 cotton pads so I cut out 25 squares from the patterned flannel and 50 squares from the plain flannel.


Then, pin three pieces of flannel together as shown below. If you're using a patterned piece and some coordinating plain fabric like I did, then be sure to pin the right sides together. You'll want to leave a small space {about one-and-a-half inches} for turning your pads right side out, which is why I put two pins on the one side. {I sometimes forget to leave my space until the end and it's easier to close up your space when it's in the middle of your fabric rather than at an end.}

Stitch around each pad with about 1/4" seam allowance. I usually just line it up with the edge of my foot and zip around. Again, be sure to leave about a one-and-a-half-inch space along one side so that you can turn it. Don't forget to backstitch on both sides of the open space, otherwise your threads will unravel when you go to turn it right side out. 


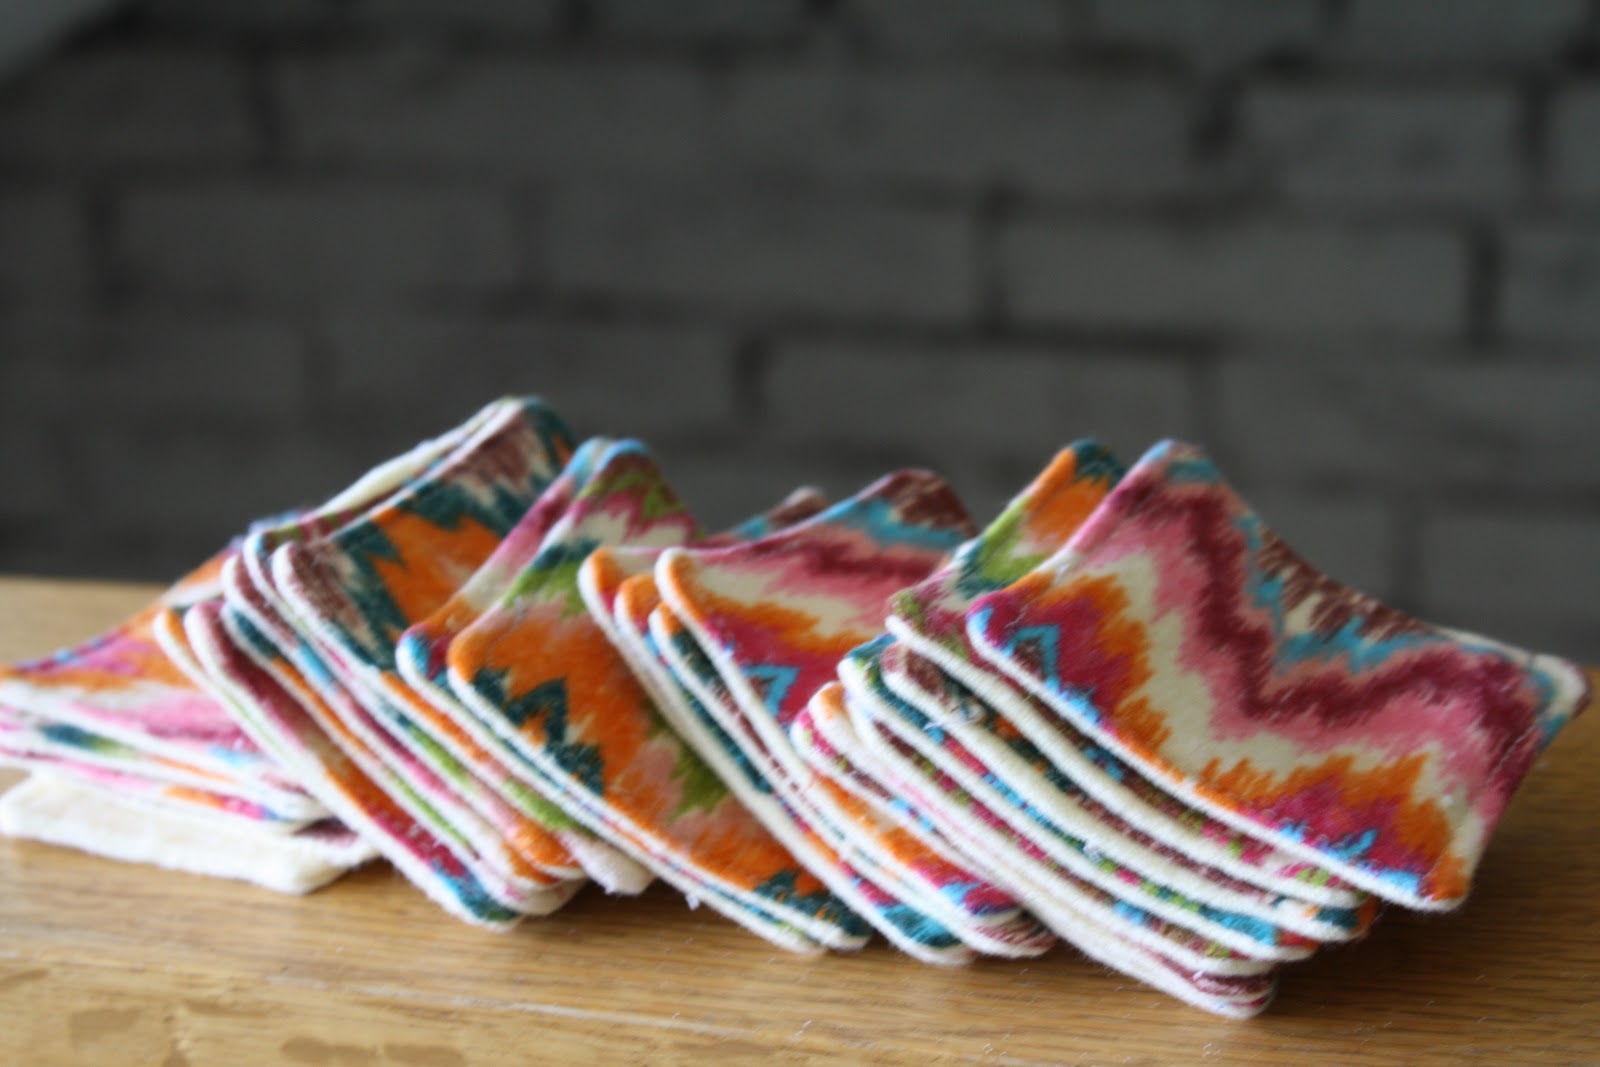
Clip all four corners of your pad and trim off the excess material {not necessary, but it'll make top stitching easier if there's less bulk}. Go ahead and turn your pads right side out, poking out all four corners with a chopstick {or whatever tool you prefer}. Fold the open seam under about 1/4 inch and press with a hot iron to hold it in place. Top stitch around each pad, sewing the opening closed. I sew as close to the edge as possible--about 1/8". You'll probably have to hand crank your corners as it gets a bit bulky and hard to feed through the machine. But once you finish, you'll end up with a pretty little reusable cotton pad like this:


Nice and thick and soft!


I will warn you that this project can be a little time consuming, since you're working with small pieces. But it's totally worth the effort! And if you're going to make a few, why not make a few more so that you'll have enough to last you for a while.


If you need some eye makeup remover to go along with these reusable cotton pads, check out my tutorial for avocado eye makeup remover. It's ah-mazing!


Not up for the project? Want some of your own or for a gift? Email me at lifesongmama@gmail.com for more information about placing your custom order.

Monday, February 25, 2013

DIY Avocado Eye Makeup Remover


I've always been low maintenance. But now, after two kids, I'm especially low maintenance. My daily makeup routine has dwindled over the years to a quick coat of mascara. On a good day.

I had been using the most delightful smelling eye makeup remover on the market. It contained white tea and the scent was so soothing and wonderful. I looked forward to cleaning the mascara off of my lashes each night! But something weird happened about halfway through my last pregnancy. Suddenly, nothing would remove my mascara. It's like my skin secreted some strange mixture of oilishness {for lack of a better word} and no commercial product would do the trick.


Desperate to find something that would remove my mascara without also removing my skin and lashes, I tried this DIY eye makeup remover. It worked! {I did have to add some extra olive oil to the mixture after a while, but as long as I gave it a good shake, I was in business.} This time around, I altered the proportions slightly and decided to try it with avocado oil instead of the olive oil. Avocado is amazing for your skin. It contains a high Vitamin E content, has a natural hydrating ability, helps to produce more skin collagen and reduce the occurrence of age spots, and it's high in omega-3s which help to block harmful UV rays. {Click here to read more}


Needless to say, my avocado eye makeup remover works like a charm. With barely any pressure and wiping, all of my makeup is removed and the skin around my eyes appears smoother and softer. I have never been an eye cream person {too expensive and really, I haven't seen too many real life success stories} but I will say that I've noticed a considerable difference in the skin under my eyes since I started making my own eye makeup remover. It really does make eye cream unnecessary. And the best part is that it's super inexpensive to make.

Avocado Eye Makeup Remover
What you need:
~ 1/2 c. distilled water
~ 1-2 tsp. avocado oil {I started with 1 tsp. and added a little more to suit my liking}
~ 1/4 tsp. Castile soap {I used Dr. Bronner's unscented baby-mild}

What you do:
Simply mix everything together and use. Make sure to give it a good shake before using to ensure that everything gets mixed up.

Give it a shot and let me know what you think! Are you a DIY cosmetic person? What products do you swear by for removing makeup?

Wednesday, February 13, 2013

Valentine's Day DIY: Easy Heart Shaped Lotion Bars

So tomorrow is Valentine's Day! I've been pinning Valentine's ideas for months, it seems, and all of a sudden it's here. And I didn't get around to decorating or making any of the ideas I pinned. {sigh} Next year, maybe.


I have been wanting to make these lotion bars for a while now, since my fingers are always cracked. I recently happened upon some heart shaped silicone ice trays in the dollar zone at Target, so I knew that I was meant to whip up some lotion bars for a quick and easy Valentine's gift.


I added this sweet bag topper to bags my husband picked up at the dollar store and tied it with some bakers twine to make a pretty {and super quick and easy and CHEAP} Valentine's Day gift!


Easy Heart Shaped Lotion Bars
What you'll need:
One part coconut oil
One part beeswax
One part shea butter or cocoa butter {or combination of both}
Essential oil of your choice {optional--the natural scents of the oils and beeswax are quite nice on their own}
{I made my lotion bars using 8 ounces for each part and using both the shea butter and cocoa butter, each in 4 ounce parts}

How to do it:
Combine all ingredients in a double boiler and stir constantly until melted. {I use an electric double burner turned to low and it never burns.} Remove from heat and add essential oils if using, stirring until combined. {I used 25 drops of sweet orange essential oil and I can barely make out the scent. I will try using 50 drops next time for a more potent fragrance.} Pour into molds and let sit for 24 hours to harden.

What are you doing for your Valentines this year? 


Wednesday, October 10, 2012

October #Unprocessed: Checking In

Halfway through Week #2 of the October #Unprocessed Challenge, I thought I'd check in and let you know how it's going in our home. Last week, we were not as committed as I had planned. But then again, some things you just can't plan. Last minute invites to a birthday dinner and a breakfast out with family {my favorite meal to eat out...} threw some wrenches in our plans. But overall, we were definitely much more intentional about making sure we avoided even the processed organic food that we often gobble down with no thought.
One of my favorite dishes that graced our table last week was my Fall version of Shepard's Pie. Shepard's Pie is a favorite in our house, but this time I used mashed sweet potatoes instead of regular mashed potatoes to top off this savory dish. It was a gamble for me, knowing that my hubby proclaims to hate sweet potatoes. But I was pretty sure he'd like them served this way, since they wouldn't be sweetened. Just savory. Sure enough, he was a fan. {He wolfed down the savory sweet potato fries I made the week before too! I think he's finally realized that it's not sweet potatoes he hates, but the sugary, sweet and completely false preparations he's been served over the years.}
For snacks last week, I mixed up a batch of trail mix. Tired of paying high prices for trail mix that wasn't even good for me, I started making my own mix over a year ago. I love shopping the bulk room at our local natural food store and have found that I can control my ingredients making the mix exactly how we like it while being able to skip the hassle of carefully scanning the ingredient list on the package for processed imposters. I've done the math and my mix ends up costing exactly the same as I can purchase a similar {though processed--because M&Ms are not a whole food} product at our wholesale club. Our mix usually entails a mix of equal parts peanuts and cashews to equal parts diced pineapple, diced papaya, raisins and dried cranberries with some pumpkin seeds thrown in for a little extra nutrition. Sweet. Salty. Delicious! I also made homemade nutrigrain bars for another between-meal snack.
Our chickens are in full production mode now, and we are swimming in eggs at this point. It's a wonderful problem to have. So {my hubby's} breakfast generally consists of runny eggs and toast made from homemade bread. I made this delicious oatmeal bread last week and froze one of the loaves so that we are now enjoying it this week too! I love yogurt, though, and made some granola to eat with that for breakfast. A little local raw honey drizzled on top adds just the perfect amount of sweetness to the otherwise sour creaminess of my plain yogurt. My little guy also loves yogurt or for some variety I make him some oatmeal using just apples and cinnamon to sweeten the pot.
So, although we haven't had a perfectly unprocessed October, we have been as intentional as possible about eating a largely unprocessed diet. Thankfully, the produce from our CSA keeps us focused on the challenge as well, as we're always looking for new ways to use seasonal veg. It's definitely a challenge, but it's also worth the work involved. And thankfully, sweets aren't completely eliminated from our diet {definitely craving more sweets during this pregnancy!!}. For dessert, we've been enjoying this naturally sweetened apple pie. Soo delicious!
 Did you take the challenge? Feel free to share some of your unprocessed recipes! {I'm always looking for some new ideas}

Tuesday, September 25, 2012

My Food Journey {and October #Unprocessed}

I love food. I love to eat. Fortunately, God gave me a good set of genes and a healthy appetite for exercise. I've always been the girl who scavenges friends' lunches for unwanted leftovers and who has helped herself to thirds at dinner. {Having a salty tooth, I often consoled myself with the fact that while I ate three helpings of dinner I usually skipped dessert. It evened out, right?}

But, over the past four or five years my views on food have slowly, but radically changed. Don't worry. I still love food. And I still love to eat. But a few years ago, I didn't know what I was eating. And I didn't care. I lived a life of moderation and balance, so I figured I was okay. And then I joined a healthy living small group at my church. It was made up of about 6 women and we talked about food, healthy lifestyles and our body image. I came in a bit skeptical, knowing that the organizer {a good friend} is a die-hard organic type of gal. I was in law school. I knew that even the term organic came with its own set of qualifiers. So I resisted. I debated. I was studying to be a lawyer, afterall. And I walked away from it thinking I hadn't really been affected. Maybe I won or maybe it just wasn't for me. Either way, I still didn't feel convinced.

But the problem was that I was now a whole new level of educated. And with education came an acute awareness in certain settings that was never there before. Now, I would walk down the aisles of the grocery store beleaguered by the devil/angel debate going on in my head.  

You should read that label. It probably isn't very healthy. High fructose corn syrup? Really? Do you know how many pesticides are just waiting to be devoured on that? You can't wash them all away. Don't do it!

Don't worry about the label. You never read labels before and look at you--you're in perfect shape. Good health. No worries. Don't you remember the recipe you are planning on making with this? A substitute just wouldn't do. You would be so disappointed. Do it!

And just like that, my perspective began shifting. And my choices reflected my new way of thinking. I began investing my time reading more about the ways in which our foods are grown and processed. And I began researching ways to make homemade whole-food substitutes for some of those terrible offenders in many of the foods I loved. As Michael Pollen suggested in The Omnivore's Dilemma, eating really had become a moral and ethical dilemma for me.

Fortunately, I wasn't alone in my dilemma. My husband joined me on this journey and we equally, separately and yet unitedly, believed that changing our way of eating was vital. Fortunately, eating a whole foods, natural, local, and/or organic diet didn't mean tasteless, boring and undesirable. {Remember my last post about those sinfully delicious chocolate chip cookies? Even they can technically be considered an unprocessed food, because I used whole-food ingredients!} And fortunately, I love to cook, invent and create in the kitchen. So instead of viewing this as the end of a delicious feast, we began to look forward to it as a challenge in which the reward would be great. Not only would we reap a personal reward of a healthier lifestyle, but by supporting our local farmers we would reap a better local economy and a better environment {because we weren't supporting all of the carbon that goes into transportation}. And by choosing sustainably raised and grown meat and produce {whether or not certified organic--because that really is just a fancy and expensive bureaucratic descriptor} we were reaping a better environment and humanely raised animals. The whole goal of sustainability, afterall, is to promote a model of growth that can support itself for years to come without destroying our precious remaining resources.

Fast forward to yesterday when I opened my email and clicked on Aimee's post about October Unprocessed over at Simple Bites. In a nutshell, it is a challenge to go one month {or whatever length of time you can realistically commit} without eating processed food. So what qualifies as unprocessed food? Well, Andrew of Eating Rules describes unprocessed food as anything meeting the "kitchen test".  

Unprocessed food is any food that could be made by a person with reasonable skill in a home kitchen with whole-food ingredients. {Andrew Wilder}

Since we already try to commit to a largely unprocessed foods diet, my husband and I immediately decided to join the challenge. For me, the challenge lies in my snack choices. If you've ever been pregnant, you know that your tastes and cravings aren't always things that are good for you. So my goal is to be more intentional in planning for the challenge of meeting these cravings with healthy, unprocessed choices. We already have a few social engagements on the calendar over which we won't have control of our food choices. So, we already know that we will have to make a few exceptions to this challenge. But otherwise, we are on board to accept and tackle this exciting challenge! Here are a few things I'm doing to prepare:

~ I've started an October #Unprocessed pin board on Pinterest to help me with menu planning
~ I will be menu planning a week in advance {which means I'm working on my first menu plan this week! I'll post my menu plan soon!} and will be accounting for all three meals plus snacks
~ I will be making a trip to Sonnewald Natural Foods this week in order to stock up on essentials such as unbleached, unenriched flour, grains, etc.
 ~ I have already signed the pledge over at Eating Rules and have signed up to follow along

So what do you think? Will you be joining me in taking the October #Unprocessed challenge? Feel free to share some menu ideas!